| 1. | Read the safety instructions first! Following these will help prevent injury or death to yourself, and damage to your property. |
| 2. | Install your fuel system. If your engine is already fuel injected, you can skip this step. Your MicroSquirt® controller can work with throttle body injection systems or port injection systems. If you are converting your engine to EFI, you will need fuel injectors, throttle body, bungs and fuel rails, a fuel pump, a fuel pressure regulator, and EFI-rated hoses, clamps, etc. |
| 3. | Install your ignition system. If your ignition system is in the list below and already installed on your engine, you can skip this step. Your MicroSquirt® controller can work with many distributors, and crank/cam wheels (of the form M-N). Click any of the following links for specific information on various ignition systems:
|
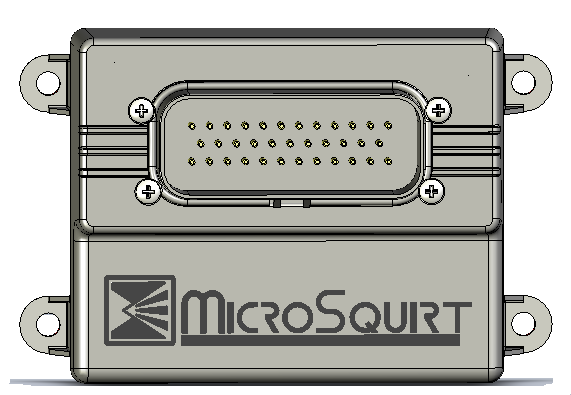
| 4. | Mount your V3 MicroSquirt® EFI controller. Your MicroSquirt® controller should be mounted in a cool dry location (not under the hood). The enclosure is 'water resistant'. You can fully seal it, if you wish. The ampseal connector is already sealed, so you just need to seal the top to the bottom of the case to get a fully sealed unit. |
| 5. | If your engine was not previously fuel injected, or for any reason does not have these components, install your throttle position sensor, coolant temperature sensor, intake air temperature sensor, optional exhaust gas oxygen sensor, and manifold absolute pressure sensor (MAP) (and/or mass air flow sensor (MAF)) on your engine. |
| 6. | Wire the sensors, actuators, and power supply to the 35 pin Ampseal harness.
- Click here for a summary of your MicroSquirt® controller's connections.
- Click here for the details of your MicroSquirt® controller's connections.

Click the image for a large wiring diagram.
|
| 7. | If you are using a manifold absolute pressure (MAP) sensor to help determine engine loading (i.e. not MAF only), connect the MAP sensor's nipple a full-time manifold vacuum source using a vacuum hose. Don't worry about the length of the hose. Pressure changes move at the speed of sound (~1100feet per second) so any delay is negligible. If you are using a MAF sensor, install it now. |
| 8. | Install TunerStudio MS (aka. "TS") tuning software (and MegaLogViewer, if you wish to view graphically datalogs of your MicroSquirt® controller's output channels). |
| 9. | Apply power to your V3 MicroSquirt controller with a relay and a good ground on the vehicle (or on the bench if you are testing). This will bring your V3 MicroSquirt® controller to life. |
| 10. | Establish a serial communication link to your PC. If your tuning laptop does not have a serial port (most don't), you will need a USB/serial adapter dongle. Install the USB/serial adapter driver software and hardware, supply power and ground to your MicroSquirt controller, and open TunerStudio MS. Go to 'Communications/Settings' and 'Detect' the connection to your MicroSquirt® controller, then 'Accept' the connection when it is found. If you do not get a connection, check these communication tips. You should then check for updated code on the MicroSquirt V3 code page (the version currently loaded on your MicroSquirt will appear in TunerStudioMS's title bar) and if a newer version is available you should load it (instructions are on that web page). |
| 11. | You need to set the "ECU Type" to match your MicroSquirt® controller the first time you run TunerStudio MS. Until you set the ECU Type, all the other parameters will be grayed out. |
| 12. | Calibrate your sensors:
If the resulting sensor values look good in TunerStudio MS, the TPS wires aren't backwards, you have set the correct MAP sensor values, etc., and you may be just minutes away from starting your engine with your MicroSquirt® controlled engine. |
| 13. | Adjust the basic configuration settings to match your engine and fuel/ignition systems. This includes the VE, AFR, and spark advance tables, cranking pulse widths, number of cylinders, ignition input configuration, set the dwell, etc. If you are using a toothed wheel with 1, 2, or 4 cylinder wasted spark, or 2 cylinder sequential (with an additional cam sync signal) in one of the Dual Spark ignition modes, configuring this setup is now easy
with the AutoTrigger mode. |
| 14. | Check that your V3 MicroSquirt® controller recognizes the tach signal while cranking so it knows how fast the engine is turning. Remove the fuel pump or injector fuses and crank the engine for a few seconds with TunerStudio MS connected, running and datalogging. TunerStudio MS's datalog (and tach) in should show 150 to about 400 rpm while cranking. If it does, you have good ignition input(s). If you do not get a tach signal, re-check your ignition input configuration. Replace the fuses you removed earlier. |
| 15. | Now you can begin to tune the MicroSquirt® controller's parameters to make your engine start, warm-up and run well. Start by trying to get your engine to start and idle, then progress to higher engine speeds and loads. If you have not tuned an EFI system before, please review the basic EFI tuning guide. You will need to tune the cranking pulse widths, afterstart enrichments (ASE), and warm-up enrichments (WUE) and idle air controller parameters, a volumetric efficiency (VE) table, the air-fuel ratio (AFR) table, the spark advance table, and the acceleration enrichments. |